The “Natural” Look

Our idea of looking natural, isn’t really all that natural.  Unless of course we mean to say we want to look as we really are.  In which case we don’t need makeup do we?  When a client tells me she wants to look “natural” what she really means to say is, “I want to look perfect AND like I’m not wearing any makeup.  I hear you sister, so do I.

Here are a few tips to help you achieve that “natural” look.

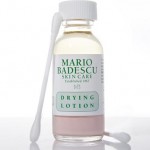
1.  Take care of your skin. The better shape your skin is in, the less face makeup you’ll need.  Please remember, no amount of makeup can cover dry or peeling skin.  In fact, makeup usually makes it look worse.  I have recently fallen in love with several products from the Mario Badescu line, specifically: Enzyme Cleansing Gel, Glycolic Foaming Cleanser, Glycolic Eye Cream, and most of all the Facial Spray with Aloe, Herbs, and Rosewater…it’s delightful, refreshing and soothing.  You’ll be pleased to know that the most expensive item on that list is $20.00 the others range from $12.00 to $7.00.  You can thank me later.  oxox

2.  Select a foundation or tinted moisturizer that is the same color as you are. Do not try to “correct” your skin tone with your foundation.  You’ll wind up looking like your head belongs on a different body.  Go to the cosmetic counter with no makeup on…I know, I know, but trust me on this one.  Select three foundations that are within the realm of possibilities and make a stripe of each one running down the side of your face (mid cheek to mid neck).  The one you have a tough time seeing, is your color.

In the nineties we had a huge backlash against pink foundations, and with good reason, many, if not most of us are far from the pink color they were pushing.  Unfortunately we over compensated and suddenly everyone was yellow.  The truth is, we are neither completely yellow, pink, brown or red any more than we are black or white.  In real life we know this, don’t lose sight of that fact in the cosmetic department.

3.  Use foundation to even out your complexion. Foundation and tinted moisturizer, are simply meant to even out your skin tone.  In my humble opinion, a sponge gives you the best, most even, and sheerest application.  Do not try to use foundation as concealer or cover up, a thickly applied layer of foundation looks like, well, a thickly applied layer of foundation, not the “natural” look we’re going for here.  If you have dark circles under your eyes don’t bring your foundation all the way up under the eye, we’ll use a concealer for that. The fewer layers of makeup, the better.  If you don’t have particularly dark circles under the eye, go ahead and take the foundation all the way up to the lash line.

4.  Camouflage and concealer have specific purposes, use them. If your skin is perfect, you can skip this step.  The rest of us however, will want to pay close attention.  Ahem.  Concealer is meant for the under eye area.  It should be relatively creamy so that it goes on easily, without pulling the delicate skin around the eye.  Camouflage, or cover up, is a different animal altogether, it’s meant for the face.  It needs to be a bit thicker and drier than concealer so that it will stay in place, and not cause nor worsen blemishes.

Apply your concealer only to the areas under your eyes where you need it.  Pay attention to detail here.  There is no need to cover the entire under eye area if you’re only dark in the inner and outer corners for example.  After you’ve applied the concealer to your darker areas, use your finger to pat it into place.  The patting motion blends the concealer without removing it altogether.

Use camouflage, with a synthetic bristled brush, as an eraser.  Lightly paint over what you’re seeing through the foundation that you’d rather not see.  Use the light tapping motion again here to blend.  Remember, do NOT rub.  It will remove the product you just applied.

A special word about pimples: pimples are generally shaped like mini volcanoes.  If you tap on top of the volcano to blend, you are going to remove the camo from the peak while the base of Mt. St. Helens remains unblended.  Why?  Because your finger can’t get to the bottom, it’s being stopped by the apex of the volcano.  Forget your finger when it comes to pimples and just use your brush to blend the outer edges.  Once you’ve camouflaged the top of the pimple, leave it alone.

5.  Set your makeup with translucent powder and a puff. Every step up to this point has involved a liquid, or at the very least a creamy, product.  If you want to keep your makeup on your face you must set it with powder and a puff.  “Why the puff?”, you ask after spending upwards of $60.00 on a powder brush.  A puff presses powder into the makeup on your skin and actually sets it in place, whereas a powder brush lightly dusts powder all over you face (and your bathroom) without setting your makeup.

Setting with a translucent powder is key here for all, from  the darkest complexion to the lightest.  Tinted powder will change the color of your carefully chosen foundation.

6. Your skin is multicolored; use bronzer AND blush to achieve a truly “natural” look. Your skin at this point looks perfect, yet bizarrely monochromatic.  Now is the point where we apply bronzer to bring some of the color obvious in your arms, chest and neck, back to your face.

Please do not paint racing stripes up the sides of your face.  Contour is fine in black and white photographs, but in real life it is rarely done well.  I advocate avoiding it altogether.  Instead, I prefer to apply bronzer softly to the high points of the face; where you’d naturally get a bit more color first.  (Forehead, bridge of nose, tops of cheeks, chin.)

Next, smile.  Apply blush with the flat side of your brush to the apples of your cheeks; where you would naturally blush if you were so inclined.  Consider The Salt Analogy” repeatedly at this point.

Lastly, blend with a dry sponge.

Welcome to the land of the perfect “natural” people.  What you choose to do with your eyes and lips is entirely up to you.  I’d just comb out my brows, throw on some lip gloss and mascara and call it a day…you know for that truly “natural” look.

Meanwhile, what you’ve just learned will never need to be learned again, even as fashions change.  “Natural” is natural forever, unless we evolve into something else, at which point I promise to revise this post.  oxox  Enjoy!

[fblike]
Makeup and Little Girls

I submit to you that makeup is not for little girls.  Neither is red nail polish, nor short shorts with “volleyball” or whatever written across their backsides.  …in my humble opinion of course.  Having said that, there will come a day when your pre-teen wants to start wearing makeup.  This post will feature a few age appropriate products.  I believe this measured yielding to her powerful girlie will may help you stave off a full on black eye liner driven revolt.

Start her off with skin care.  Mario Badescu has a line of cleansers, toners, treatments and moisturizers that are plant based, effective, and best of all inexpensive.  Sit with your daughter and read through the product descriptions online, the two of you can make an informed purchase together based on her needs.  Having your little princess begin a skin care regimen now sets up a great life long habit and will help her avoid problems in the future.  In addition, she’ll feel a bit more “grown up”, which is really what all this is about, isn’t it?

When it comes to actual makeup, I’d make the trip to the cosmetics department alone.  There are far too many bad decisions to be made and potential arguments just waiting to be had if you make the trip together.  Think of what some of the makeup artists look like and what your daughter may think is “cool”.  Almost certainly NOT age appropriate.  Surprise her with a little goodie bag of your choosing.  If she never saw the sparkly blue eyeshadow and black lipstick, she won’t be disappointed with what you bought.  In fact if she didn’t even know you were going, she’ll be thrilled.

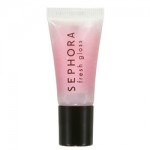
Sephora makes a gloss called “Fresh Gloss”.  It’s perfect for a young girl.  Sheer, shiny, pale and shimmery.  This is a color that will look good on any complexion.


Mascara is honestly something I would try to avoid.  Grown women who can’t help but touch their eyes look like a hot mess at the end of the day.  Imagine your pre-teen, after P.E.  Not exactly the sweet fresh faced look we’re going for here.  Instead, how about a little bit of a soft brown eyeshadow, like Cork from MAC, smudged into her upper lash line?  She’ll be able to see the color and it will enhance her lashes.

I would leave it there on the makeup front.  How much more does she need really?  A couple of other things you might want to throw in her little goodie bag to distract her from the lack of makeup are perfume and nail polish.

My daughter is absolutely in love with Harajuku Lovers Fragrance by Gwen Stefani.  The packaging is fabulous and the fragrances are lovely and varied.

OPI makes a great long wearing nail polish.  For the name alone, Prinesses Rule! is one of my favorite colors for a young girl.

So there you have it!  Put everything in a cute cosmetic bag and hand it over.  She’ll be thrilled and hopefully you’ll have kept her a little girl, for at least a while longer.

[fblike]

Focus: The Perils of Pressed Foundation Powder

This week a young woman came in looking for a pressed foundation powder.  Poor thing’s skin was all shades of broken out, and judging by the scars it had been for some time.  I asked her why she wanted a pressed foundation powder as opposed to loose, or some version of a traditional liquid foundation.  Eventually it all boiled down to ease of application.

Here’s the thing, pressed powder (whether it be foundation pressed powder, regular pressed powder, or mineral pressed powder) is a terrible choice for acne prone skin.  The issue is not so much the formulation of the product, it’s the mode of application.  Think on this; as you take the little puff that comes with your powder and rub it all over your face you’re picking up about a million hitchhikers as well as the oil they eat.  Yes, you are not only transporting bacteria back and forth from your face to your compact but also giving them the means to stay alive.

When you’ve finished applying your powder, you take the loaded puff, place it on top of your powder and close the compact, establishing a safe and warm environment for the bacteria to breed.  Now repeat this process daily, or even a couple of times a day until you run out of powder.  Eww.

It has been suggested that keeping the puff and the powder separated resolves the issue.  Some companies have created compacts that hold the puff in it’s own compartment, others suggest you retain the little plastic film that comes on top of new powders and use that as the means of separation.  While I can see how that might help minimize the problem, it still doesn’t negate the fact that you’re spreading bacteria from your face to your product, then back again.

So what’s a girl to do?  I suggested she try an oil free foundation.  My client was resistant to doing more than one step.  (Liquid foundation, in most cases, requires the use of loose setting powder.)  There was really only one obvious choice in that case, loose mineral powder.  She was unconvinced.  The truth is, loose powders are messier and not as convenient as pressed powders.  Ultimately, she bought what she wanted in the first place, a pressed powder foundation.

Please keep this in mind.  In cosmetics, as in life, the easiest way is not always the best.

[fblike]

Red Lips

Red lips are fierce, and we know this.  You are either the sort of woman who wears crimson without a second thought, or the kind of woman who shudders at the thought.  It’s quite cut and dry really.

Well, I am here to tell you that there is a red lip out there for everyone, you just have to do a little sampling.  Get with a salesperson and hit the cosmetic counters.  Be prepared to try on a few shades.

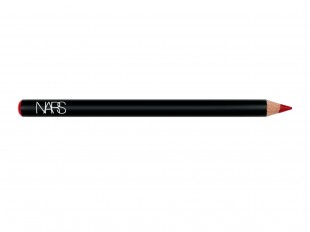
My all time favorite red lip is simply Jungle Red Lipliner Pencil by Nars.  I just draw them on, fill them in and bam!  There’s no stopping me sister.

The best thing about using just a pencil when you’re dealing with a bright or deep color like red, is that you don’t have to worry about it smearing all over your face, or Heaven forbid, creeping it’s way up into fine lines around your mouth.  Also, it lasts.  If your lips are a bit dry use the teeniest amount of lip balm to smooth them out, then apply your pencil.

Remember when working with red, take your  t i m e.  Work in light small strokes around your mouth until you’ve outlined it’s shape, then carefully fill in with liner or lipstick…or both.  If you want to really throw caution to the wind, add a little pop of gloss, clear is fine, to the middle of your top and bottom lip.

Yes it is ok to even out your lips.  No one has perfectly symmetrical lips.  If you like larger lips and one side of your bottom lip drops a bit lower than the other, bring the other side down.  If one side of your top lip is larger than the other make ’em match girl.  The key here is subtlety.  Don’t draw a whole new mouth.  Do even things out.

Lastly, in nearly every case, a strong mouth means you need to ease up on the eyes.  Think about a soft cat eye, or just black mascara. Now hold your head high, smile and wait for the comments.  They usually go something like this, “Oh, I could never wear that color”, or “I’m just not brave enough to wear a red lip.”  Guess what?  You are.

oxox

S

[fblike]

Curly Mantra: I love my curls, I love my curls…

Curly hair?  Breathe deeply, in through the nose out through the mouth, and repeat after me.  I love my curls, I love my curls.  I know it can be difficult to deal with, but don’t stress over those tresses.  You just have to understand how to take care of your gorgeous locks.

As if you didn’t already know, curly hair is different from straight hair.  If you look at straight hair under a microscope you’ll see that it’s cylindrical.  A strand of curly hair is flat.  At each point where a strand of curly hair bends, the cuticle of the hair opens somewhat, which is why curly hair generally needs more moisture than straight hair, it loses moisture at each bend.

Because it is different, it needs to be treated differently, for example do NOT rub your hair with a towel when you get out of the shower.  You’re increasing the frizz factor.  Simply press it with your towel to remove excess water.

The following are two different lines specifically created for curly hair, each with very different price points.  I highly recommend them both.

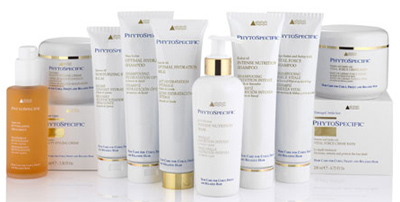
Phytospecific (yes, it’s true, I’m all about the Phyto), is fabulous, plant based, and ultra hydrating.  Unfortunately, as with most fabulous things, the line is a bit pricey.

They have three levels of products, normal to dry, ultra dry, and damaged and brittle, as well as styling aids, leave in conditioners and (dare I mention it), two levels of relaxers, if you must.

If your hair is very fine and curly, Phytospecific might be a little too heavy for you.  Before buying the product, get your next blow out at a salon that uses the products in the back bar (at the sink), and see how well it works for you, or you could simply try to score some samples.

Just as a side note, most of the women featured in Phytospecific marketing materials are black.  That does NOT mean that this is a line exclusively for black women.  What it does mean is that you lovely dark skinned ladies are their target demographic.  The line is simply for all types of curly hair, from a wide curl pattern, to a tight curl pattern, period the end.

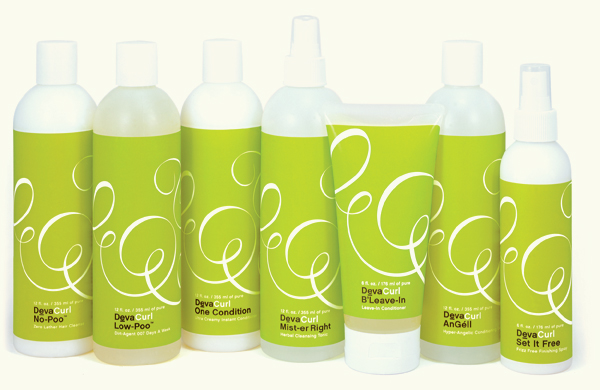
Now, let’s talk DevaCurl.  Remember when I said most fabulous things are pricey?  Well, I’m sticking to my guns on that statement, however, DevaCurl is the exception to the rule.

DevaCurl is 100% sulfate free, in fact the shampoos are named No-Poo, and Low-Poo.  That’s not baby talk for some unmentionable bodily function, rather a reference to the fact that the shampoos have either no lather or virtually no lather.  There is no need to completely strip curly hair of it’s own essential oils with harsh chemical lathering agents in order to cleanse, and DevaCurl knows this.  One of my all time favorite products is Mist-er Right, a lavender scented curl refresher, excellent for bringing the shape back to crushed curls in the morning.

DevaCurl has nearly a cult following.  Legend has it that the owner operates a salon in LA catering exclusively to curly haired clients.  If you want to have your hair straightened, they take you to a dark room in the back.  (I just made up that bit about a darkened room, I thought it added a certain je ne sais quoi.)

Meanwhile, regardless of which line you choose, you really should check out the DevaCurl site.  It is possible that Lorraine Massey, co-owner of the line, knows more about maintaining healthy curls than anyone on the planet.

[fblike]

The Salt Analogy

I spend a good portion of my life teaching women, and sometimes men, (hello, I am from Miami), how to apply makeup.  As a result, I have come up with what I think is a very helpful analogy.

Most of us, at one time or another have had to cook something.  Those that haven’t, have certainly eaten.  Applying makeup is like adding salt to your food. You add a little salt, then have a taste, a little more, have a taste.  Adding too much salt is disastrous.  The outcome is  terrible and it’s virtually impossible to remove.  You’ve basically got to start all over.

The same principle applies to makeup.  Apply a little, have a look, a little more, have a look.  You can always add more.  Taking off too much, however, is not always an easy task. In a great many, if not most, cases it requires that you start all over.

So there it is my friends, the salt analogy.  Hope you find it useful.

[fblike]

Hair Oil

It sounds so old fashioned doesn’t it?  What are we greasers?  Maybe those boys knew something we don’t.

The fact is that hair oil is wonderful for maintaining both the health of your hair and your scalp.  In fact, without a healthy scalp you can kiss healthy hair goodbye.

Here’s the catch, you need to find the right oil for your particular issue and hair type.  These  are a few of my favorites.

Huile D’Ales is a water soluble oil. This is important as you can have your colorist add it to your hair coloring or bleach as it won’t interfere with chemical processes.  It provides protection from the chemicals and supposedly gives you a bit of a treatment at the same time.   I went from Wonder Woman black hair to Marilyn Monroe blonde, and am sure Huile D’ Ales is the only reason I’m not currently bald.

It’s also a great hydrating oil treatment for all hair types. Simply apply it to dry hair and leave it in for as long as you like, as often as you want, then shampoo and condition your hair as you normally would.  The product is light weight, so it won’t weigh down even the finest of hair.

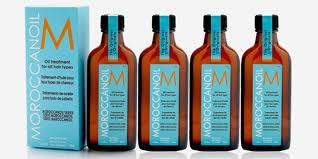
Love, love, love this product.  The fragrance alone is enough reason to fall in love with MORROCANOIL.  I use the smallest amount, about the size of a dime, on the lengths and ends of my hair after I’ve shampooed and conditioned.  The result is beautiful smelling, well conditioned, shiny hair.  Even after a blow dry I use an even tinier amount to further smooth the hair.

If you have very fine hair, you can still use the product, just take baby steps.  Try a drop on damp hair and see where that gets you.

Yes, I’m back to Phyto.  Phytopolleine is an amazing product that I have seen work it’s magic.  It can be used as part of a thinning hair regimen or as a scalp normalizer.  Basically, it stimulates your scalp increasing circulation.  Increased circulation = fertile ground for hair growth.  Phytopolleine also helps regulate sebum.  So, if your scalp is either too oily or too dry, Phytopolleine will help.

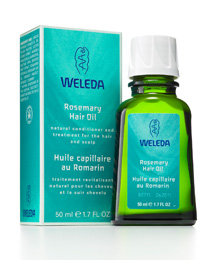
I would be remiss not to mention Weleda Rosemary Hair Oil.  Weleda has been at the forefront of the organic, plant based product movement since before most new companies owners were even born.   I have tremendous respect for  Weleda, and have used an array of their products, all to my satisfaction.  Alas, I’ve not used this one.

Rosemary acts as a stimulant, which increases circulation.  We’ve already discussed the importance of that.  In addition, rosemary is both an antibacterial and antiviral agent.  Rosemary Hair Oil also contains Burdock which is known to help the body maintain skin health.

Unfortunately, I can not recommend this product as I haven’t used it, but it sounds pretty good to me.

[fblike]

Focus: Dehydrated Skin and Green Eyes

I had the most fabulous client today; a genuinely happy person, and it showed.  She had delicate features and huge deep set green eyes.  Beautiful.

She came in with no makeup, (thank you), just moisturizer.  Even moisturized, her skin appeared very dehydrated.  I pressed a little of Laura Mercier’s Perfecting Water into her skin with a cotton pad and voila!  The improvement was instant.  I really focused on the skincare with her.  There was a redness to her skin that was just a result of being overly dry.  After using serum, day cream, eye serum, and eye cream, the redness was diminished.  This was one application.  Imagine what she’ll look like in a week.  Happily, she bought it all.  I can’t wait to see what she looks like next time I see her.

While skin care is the most important aspect of your beauty routine, in my humble opinion, color is the most fun.  As I mentioned, huge green eyes.

1.  I used a very sheer application of Laura Mercier Metallic Creme Eye Color in Platinum, from brow to lash.  Starting at the brow to get the greatest concentration of pigment there, then pulling it down so it gradually fades toward the lash line, as a result of what’s left on the brush really.

2.  Then I used the same product in Burnished Copper moving in the opposite direction, (in other words, starting tight to the lashes and pulling up, stopping just under the crease, so the color on the brush starts to fade just under the crease).

3.  I used the best tool in the world, my finger, to softly blend where the two colors meet, so as to transition from one color to the other seamlessly.

4.  Next, I used a very small amount of Laura Mercier Sherazade Eye Color (sort of an earthy golden green…I know it sounds scary, but it’s not) in the outer corner of her eyes, imagine a soft sideways “V” shape.

5.  Again with my fingers, I gently patted the Sherazade into place over the creme colors.

6.  Last but not least, I gave her a tight line with Laura’s Black Ebony liner just under the lashes, followed by a coat of mascara.

Gorgeous.

I will recreate the eye and post pictures at a later date. If any of you decide to give the look a shot, I’d LOVE to see your pictures!

Goodnight beautiful creatures!

[fblike]